In the world of nail art, geometric designs have taken center stage as a contemporary and stylish choice for those looking to express their creativity. With their clean lines, bold shapes, and striking patterns, geometric nails provide a chic alternative to traditional nail art styles. Whether you are a beginner or a seasoned nail artist, incorporating geometric designs into your manicure can elevate your look and add a modern flair. In this comprehensive guide, we will explore various geometric nail art ideas, techniques, and tips to help you create stunning nail designs that are both fashionable and fun.
Geometric nail art has become increasingly popular for a variety of reasons. The allure of geometric shapes lies in their versatility and contemporary aesthetic. Here are a few reasons why geometric designs are a perfect choice for modern nail art:
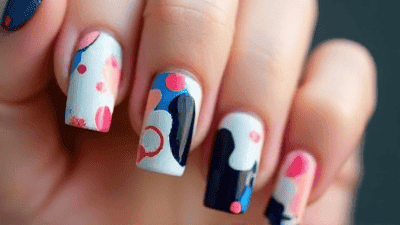
Geometric patterns often feature bright colors and sharp contrasts, making them extremely visually appealing. The combination of shapes and colors can create a striking effect that draws attention and makes a statement.
One of the greatest benefits of geometric nail art is its versatility. There are countless shapes and patterns to choose from, making it easy to customize your designs to fit your style. Whether you want minimalist designs or intricate patterns, geometric nail art can cater to all preferences.
Geometric designs offer endless possibilities for personalization. You can mix and match colors, shapes, and finishes to create a unique look that showcases your individual personality.
From casual outings to formal events, geometric nail art can be adapted to suit any occasion. Simple patterns can lend a touch of sophistication to professional settings, while bold designs can add a fun element to parties or nights out.
Geometric patterns are deeply rooted in contemporary design, making them a trendy choice for nail art. Incorporating geometric elements into your manicure will keep your look fresh and aligned with current styles.
Before diving into geometric nail art designs, it’s important to gather the necessary tools and products. Having the right items on hand will make the process smoother and more enjoyable.
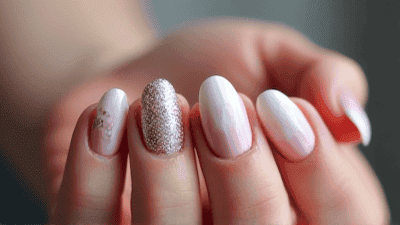
Nail Polish: A selection of colors is essential. Consider bold hues, pastels, and metallics to create stunning geometric designs. High-quality polishes generally apply more evenly and last longer.
Base Coat: A protective layer helps to prevent staining and improves polish adhesion.
Top Coat: Topcoats add shine and protection to your designs, ensuring they last longer and maintain their vibrancy.
Nail Art Brushes: Invest in a variety of nail art brushes, including fine-tipped brushes for intricate designs and wider brushes for base application.
Dotting Tools: These are perfect for creating dots and small geometric shapes in various sizes.
Striping Tape: This thin tape is ideal for creating straight lines and clean edges in your designs.
Makeup Sponges: Sponges help with blending colors or creating gradient effects.
Nail Stamping Kits: Stamping allows you to quickly apply intricate geometric patterns without the need for advanced skills.
Tweezers: Useful for picking up tiny embellishments or strips of tape.
Cotton Pads and Q-tips: Necessary for cleanup and correcting mistakes during your nail art process.
Proper nail prep is essential for achieving beautiful geometric designs. Follow these steps to get your nails ready:
Start by washing your hands thoroughly and removing any old nail polish. Ensure your nails are free from oils or products for better adherence.
Use a nail clipper to trim your nails if necessary, and then file them into your desired shape—whether square, almond, or oval.
Gently push back your cuticles using a cuticle pusher or a wooden stick. This step helps create a neat edge around your nails for a polished look.
Lightly buff the surface of your nails to create a smooth canvas. This will help the base coat adhere better.
Finish your prep with a thin layer of base coat to protect your natural nails and encourage polish longevity.
Once your nails are prepped, it’s time to explore the techniques that will help you create stunning geometric designs. Here are several methods to incorporate into your nail art repertoire:
Creating simple lines is one of the easiest ways to start with geometric nail art.
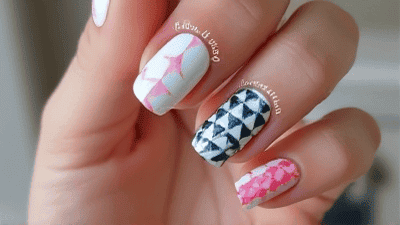
Triangles and chevron patterns are popular geometric shapes that can be easily applied.
Combining dots and lines can create visually appealing designs.
Nail stamping kits make it easy to apply intricate geometric designs quickly.
Negative space designs allow your natural nail to shine through, adding an interesting element to geometric art.
Looking for inspiration? Here are some chic geometric nail art ideas to spark your creativity:
Create a modern look with varying sizes of black and white triangles on a nude base. This design is clean and sophisticated.
Use bold, bright colors for a chevron pattern against a white base. This design is playful and perfect for summer.
Combine delicate lines and small dots using a fine brush. Choose contrasting colors for each element to enhance the visual impact.
Combine a marble effect with geometric designs using thin lines of gold foil. This mixes textures beautifully for an elegant look.
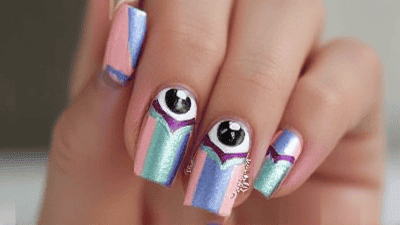
Use soft pastel shades to create delicate triangles or squares. This design captures the essence of spring in a charming way.
Emulate classic Art Deco designs with bold geometric shapes and metallic accents. Choose a glamorous color palette for a vintage feel.
Experiment with gradient blends of colors for a dynamic backdrop, then add black geometric shapes for a striking contrast.
Combine nail art techniques by mixing stripes, dots, and shapes on different nails for an eclectic and trendy look.
Even experienced nail artists face challenges. Here are some common issues you may encounter with solutions:
If your polish appears streaky or uneven, ensure each coat is fully dry before adding the next. Use smooth, even strokes for optimal application.
To avoid smudging your geometric designs, ensure they are completely dry before applying topcoat. Quick-drying topcoats can also help speed up the process.
If tape pulls away bits of polish, try ensuring the base color is completely dry before applying tape. Consider using painter's tape for gentler adhesion.
Use a fine-tipped nail brush for greater precision. If you make a mistake, use a small brush dipped in nail polish remover to correct the line.
To keep your nails healthy and strong, follow these care tips alongside your geometric nail art processes:
Regularly trim your nails to keep them maintained and less prone to breakage. Clean your nails thoroughly to avoid dirt buildup.
Use cuticle oil regularly to nourish and hydrate your cuticles. Healthy cuticles contribute to overall nail health and beauty.
Avoid exposing your nails to harsh chemicals whenever possible. Wearing gloves while cleaning or working with chemicals can help protect your nails.
Give your nails time to recover between manicures. Letting them breathe helps maintain their health and prevents discoloration.
A diet rich in vitamins, minerals, and proteins supports healthy nail growth. Consider foods high in biotin, zinc, and protein for better nail health.
Geometric nail art is a fantastic way to embrace creativity while keeping your manicure stylish and modern. With various techniques, colors, and patterns at your fingertips, the possibilities are truly endless. This guide is designed to equip you with the knowledge and inspiration to try your hand at geometric designs.
As you embark on your nail art journey, remember that practice makes perfect. Don’t be afraid to experiment with different shapes, colors, and techniques. Whether you opt for simple designs or intricate patterns, geometric nail art is an enjoyable way to express yourself. So gather your tools, unleash your creativity, and let your nails showcase a stunning geometric glam that reflects your unique style. Happy painting!